December 27, 2008

Counting Down to the New Year!

The year certainly has gone by quickly. Last New Years Day I was caught in the airport of hours trying to fly home from a New Years Eve Crop. By the time I got back to Orlando from Chicago it was 4:00 AM. If it had gone on schedule I would have been home for dinner! We had a wonderful New Year's Crop at the home of one of the SJ Gals. We all cane from all over, I probably came the farthest but I live in B Florida E!

February was uneventful except for daily life, which I am thankful for. I had a huge sebaceous cyst removed from my back in the office of one of the local surgeons, big mistake, why skimp on xylocaine, it's cheap stuff!!!


Flat Stanley came for a short visit which turns out to be a permanent resident here in our home as he hid from me and I didn't get to send him home to Chicago....yet!

March came and some good friends flew Air Barney down to the local airport (which isn't much) and stayed for about a week! We had great fun including trips to the local groves, winery,
EPCOT.

Of course Lynn and I had to hit the shopping in Tampa for Rubin Rouge!


Nikki came along and behaved famously! What a good dog! We were sad to see our friends fly away at the end of Spring Break but we knew we would get together once again someday soon!


Then Easter came with the obligatory egg hunt!

April brought a plethora of duties and emotions. We gained a Dear New Daughter in Law and a Precious Granddaughter. Colin married the love of his life!


May took us camping in the Keys, we liked to burned up! We did have a good time but I was ready to come home!


In June I turned right around to meet Bev in Palm Beach and take her to The Florida Keys! We made it to 0 mile marker!


The following week I boarded a plane for Colorado. Little did I know that I would be at the Southernmost point of Florida one Friday and at the top of Pike's Peak the following!


July was uneventful except for a little scare that put me in the hospital for 3 days. All is well now.

To my surprise my daughter invited me to join her in her first ever "self-paid" vacation. We enjoyed a trip out of Miami for 3 days on The Majesty of the Seas!

September brought devistation to my dear friend Kris and her family as Hurricane Ike struck and demolished their town home. As I write I am happy to say that God has truly blessed them and they are now in a new home, yet settlement with insurance, etc. is ongoing.

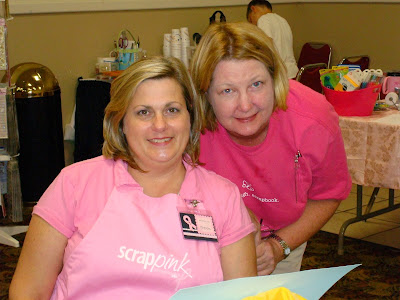
September late I spent time with my local friend Karen. We enjoyed helping a fellow LSS owner put on her crop for a fundraiser for Breast Cancer. It was a two day crop and Karen and I spent another two days relaxing and shopping!


October holds The Main Event Cracker Crop

November also gave me the opportunity to meet an online friend!
Now this girl's got a big ole camera!!!


Thanksgiving was held at our home


December 5 I met up with Jodi, Bri, and Tim!


My cousin got married on December 7!


I grieved my father's death December 8, from there things moved on and we made it through Christmas. Company party's at the house, breakfast for dinner at out house, Shepherd's Pie for Christmas Eve and the whole nine yards at DS and DDIL's new home!


No wonder I'm so tired!!! It's been a full year!!! I intend to start 2009 with another trip to the cold~~~~See you there!!!

December 20, 2008

Scraper's Poem

'Twas the night before Christmas,
I'm glued to the tree.
I'm wondering what Santa brought just for me.
Could it be card stock or chipboard or lace?
Or a Cricut, I said, with a smile on my face.

And that's when I heard him,
"Hi Santa, " I said

"You know....good little girls Should be in their beds."

"I know I should Santa, And now I've got caught.
But I was just so excited
To see what you brought."

"Well, let's take a look In this room where you work.
He shook his head quickly,
And left with a jerk.

I heard him exclaim As he put it in gear.
"You've got enough crap, I'll see you next year!"

I replied:

Dear Santa,
I wrote, it's not "scrap crap" I need,
It's recognition from those I strive to please

Oh help me Santa, help me let them see
Help me let them know what therapy I need!

There's always new toys and techniques I crave,
I want them to know it is memories I save!

Help them to know it's my art!
Teach them to know that it comes from my heart.

I know I have Bazzil out the wazoo!
I'll use it, I promise...
Would I lie to you?

Patterned paper delights me,
Like a song without words.
Oh Santa please tell me these words you have heard.

The brads, eyelets and ribbons delight
Journaling is my favorite, it's no problem, no fright!

I scrap for myself, 'tis honest and true.
Surely if anyone understands it is you.

Someone in the future will surely find insight
In the layouts I create all day and all night!

Oh Santa, it's okay if no new things you leave
I've got enablers galore who are sure to please!

So, Santa forgive me for needing an entire room
I'll finish my projects before too soon!

I'm just a little girl who has grown older with age,
But each time I complete another full page,
I feel so delighted, fulfilled and complete.
Oh Santa, don't let my dear husband give me more heat!

Dear Santa please help those who don't understand,
If they made a scrappin' wish I'd be at their command!

There's chronological, circle journals, and all kinds of swaps
My kit clubs and items I bought with some thought.

I need them, I want them, they may not be there,
Next time I visit the scrap store beware!

I promise, Dear Santa to be true to my craft.
My productions next year will be a blast!

Maybe next year you'll understand my plea,
But for now, dear Santa, it's all about ME!


Locked Out!

DH is walking the dogs, then we're going to "have a little come to Jesus talk"! He didn't answer his cell phone for two hours and I was stranded for two hours until he called with the key-less entry code. It was my fault for locking the keys in the car and I will be writing that number in several places, maybe my first tattoo? But we've had this problem before. He lets his cell phone battery die or leaves it on such a low ring he can't hear it in the bar, forgets to put it on vibrate. Bottom line, he's just not making himself readily available to me! I drive a lot of rural roads around here. The last time he did this to me I was driving home from Palm Beach through the everglades and sugar cane fields alone!!! That night he got an earful but last night I came home, he said "hello" I said "hello" took my shower, put on an ugly nightgown and got in bed. Put one king size pillow between us and the other between my legs, one pillow to hug, and one for my head. Not another word was spoken. I decided I needed to rest and settle down before I reamed him another one!

December 16, 2008

The Bean Counters Struck Today!

Oh, banking is my worst subject! While all the other kids were taking book keeping in HS, I was taking physics. I spent the whole day undoing some accounts that I had set up "with all good intention" and cancelling them today as it was a freak of a mess. Not a Christmas card was touched or a gift was created but DH and I are sleeping without guilt tonight!

December 12, 2008

My Creation is DONE!!!

Just now I finished pre-wiring all the lights, wrapped the ribbons and garland to the small wreath and wired the it to the large one and took it outside to finish. Woman, I have forgotten how stinkin' hot those glue guns get!!! I don't think I burned myself but am peeling wax off my index fingers. Once on the screw in the outside wall (oh yeah, I made my own wire hanger) I wired the jingle bells to the bottom wreath. I had to stand on a step stool to reach the top and proceeded to attach the ribbon wrapped Christmas balls, bows, and loose ends. Todd was a good sport about being my right hand man handing me glue stick refills and fetching wire. Then he counted the flowers, 18 in all, and handed them to me one by one as I placed them on the wreath and glued them down with the hot glue (which came first, the glue or the flower?). We spotted out the "holes" and filled them in. The wreath turned out just as I had planned in my head. I've been working on this in my head for weeks!!


Now, would the Little Drummer Boy please step forward and give me a drum roll.


The Enemy of Good is Better

Following yesterday's post. I bought another roll of ribbon to make my bow larger as it was quite small for the ever growing wreath. I also purchased another glue gun as mine has gone to live with one of my children. Removed the flowers to reveal the buttons and beads garland and decided that too must be removed to be replaced. Also one of the ribbon wrapped balls is coming unraveled. Well, if I am stripping it that far back I am going to add white lights. I'll probably take it out to the front entry to assemble and glue the flowers after I place the lights on.

Among other party prep that I must do such as floors and bathrooms I am going to make a huge pan of cinnamon apples. Busy day!! Catch ya later!!!

December 11, 2008

My Front Entry Wreath!!!

Ha, we'll see if Kelly makes it over here with her "sign train"! Anyway...this year I got it in my head that I wanted a wreath with fake red amaryllis on it. I wanted a grapevine wreath rather than a pine wreath in case I wanted to change the bow and transition it into a January wreath.

My home has a fully glass front door with glass side lights and a glass window above that in the entry. Lots of light in my home as it's mostly sunny here and light is so good for my state of mind.

Anyway, I finally found a small wreath at Target covered with the red amaryllis but not nearly large enough for my large entry way $20.00 in Daytona compared to $35.00 in Haines City, go figure!....Found an old grapevine wreath in my garage. Bought some wired ribbon at Mike's last night and proceeded to construct the bow. Got on a roll and wired the garland of red beads with various buttons to the large wreath. Placed the bow. Wired the ribbon covered matching balls and the jute covered ring with three jingle bells to the bottom. Proceeded to pull the flowers off of the tiny wreath and ended up with about 20 huge flowers!!!. When all the flowers were off of the tiny wreath it revealed a tightly tied grass wreath/straw/whatever. Very pretty...I proceeded to remove the hanging jingle bells and wired the little wreath to the large wreath and the ring with the jingle bells to the bottom of that. I placed the flowers flowing from left to right from about 9 o'clock down to 6 o'clock and spilling onto the little wreath. It was midnight at this point and I promised my husband no more late nights for me as it rakes havoc on my mental health. So, today I shall seek out my little glue gun and hope for some remaining glue sticks that fit and adhere the flowers to the wreath. It will be hung on the wall to the left of the door outside in the entry way. You'll get your picture later (Kelly)!

December 10, 2008

A Tribute To Family

It has taken me several days but at last I have a little "TV show" that skips through time, oh how time quickly does pass! Rather than produce something honoring only my father I wanted to take a quick little trip down memory lane. For me this has been very therapeutic!

Yesterday I went to the grave of my father and talked to myself, listened to our music, cleaned his headstone and spilled tears on his name. I talked to our Heavenly Father and now I can move on with the celebration of the true meaning of Christmas.

May the joy that comes with the true spirt of Christmas be yours this year.

December 1, 2008

Friendship Box

My design for a Friendship Box * demonstrates both qualities adding a muted look using the frosted material as well as adding strength for longevity from handling and water resistance! **Here are the supplies you will need.

Before we get started with the directions let me just show you the beautiful project* you can make and share with your best friends! I've decorated the outside of the box with the frosted full sheet product. This not only subdues the pattern on the paper but allow me to rub ons and chipboard. All paper and most embellishment products are from the Basic Grey Urban Prairie Collection, with exception of from American Crafts Premium Ribbon, and the Prima flower. The name was cut with my Cricut using the Opposites Attract cartridge. The embellishments and gifts inside are from my personal collection which have long lost their packaging, therefore I am unable to give credit to those companies.

This is the closed box, doesn't look like much but wait until you see how it "unfolds"! The box is capped on each end to hold it closed but once the caps are removed a wonderful gift of true friendship unfolds!

*** Top Cap: Built the

embellishment for the top on the glazed brad. Then place a chipboard flower on the top of the box. Mount the brad, flower, and ribbon loops with mounting tape to the top.


Bottom Cap: After constructing the bottom cap, using paper piercer poke four holes about 1/4" in and set the brads for the feet of the box.
Let's build the body of the box:

Take your pre-cut vinyl*** and paper*** to a well ventilated area. Use newspaper to protect any surrounding objects from over spray. I used Spray Craft Adhesive made by Glue Craft. It is acid free, non-yellowing, clear/invisible, re-positional or permanent (depending on the dry time before you put your item to be adhered into place. In this case we want to adhere our items permanent, so once the spray is on the object to be adhered it must be put into place right away. Be sure to read the instructions on your spray adhesive.

Have your newspaper for underneath to catch the over spray, your spray adhesive, your frosted 5 1/2" X 10 1/2" vinyl, your patterned double sided paper cut at 5 1/2" X 5 1/2 " OR (2) pieces of patterned paper cut at 5 1/2" X 5 1/2".
Spray the vinyl and lay the printed side of the paper on top and bray down for even adhesion. Spray the back (white side of the patterned paper) and adhere the second piece of patterned paper. Let this dry about 5 minutes.
Time to score this section of the friendship box. Beginning at the left with the paper up and the vinyl down (as to form the "mountains" up on the vinyl) score at 2 1/4", again at 4 1/2", and a third time at 6 3/4" leaving a 1" flap on the right. Using your paper folder fold each scored line nice and strong.
Place the bottom cap on the bottom and the top cap on the top. This will help your vinyl and paper portion of the friendship box to begin to memorize the shape that it will eventually hold. You may have trouble getting the sides not to buckle in, or difficulty inserting the caps but it will go together as you work to place the end caps onto the vinyl section.


Laying a straightedge along the scored line will help to fold these lines more easily as they are quite thick. Once you have the scored line folded continue to flatten it with your paper folder so that you get a nice 90 degree angle. You'll want the "mountains" to be on the outside (vinyl) side of the box.

The center picture shows the inside of the box taking shape


To the right is shown the outside of the box with the patterned paper subdued by the frosted vinyl.


The vinyl material on the outside of the box has allowed you to use pre-decorated chipboard shapes and rub-ons. Let's start assembling. The main technique you will use is folding the tops and bottoms of the boxes inside and the end caps, after you learn to fold this box technique you will never buy another box or use a different fold again! I love it that much!
The diagram for this is drawn here:
This information may help you with the box folding procedure.

Take each square that has been cut to size according to ***on the reverse (white) side draw an X from corner to corner using pencil and ruler. Fold each point to the center of the paper, and without unfolding fold once again to the center of the paper.
Repeat all for corners and unfold
Once you have folded and unfolded your square you will cut two lines on opposite sides as indicated by the below diagram will leave you with four squares in the middle, two "houses" opposite created by the cuts, and two "wings" opposite also created by the cut. Take your first "wing" and once again fold it to the center leaving pattern side showing and white side inside. Repeat with the opposite "wing". Follow example with the two "house" quarters and fold over the edges of the wings to secure the box. I have used adhesive squares or dots to secure the folds. When placing a brad for a faux drawer pull place it in the center of the fold closest to the center bottom quad of squares. This way when you make your final fold over the back of the brad, it will be hidden.
In order to strenghten this friendship box and to cover the inside like, "drawer lining" cut scrap pieces of paper about 1/8" less than the bottom of the box or end cap and secure with glue, I did use spray glue but a glue stick or ATC tape would work just as well. The point is you want to build your box STRONG!. After "lining the top and bottom of the inside of the boxes use your spray adhesive and quickly secure them in the bottom/top of the box by picking them up with tweezers and pressing down with the back end of your paper piercer or other tool that will allow you to press down the entire area.
Once you have your four tops and four bottoms folded and joined top on bottom you will need to cut a triangular cut on the back side that is to attach to the box. This cut will look like this. f at this point your layers of fold seem to want to "ravel" you have not put enough adhesive on the folds. The inside of the top (pink) paper must be covered with adhesive and stuck to the bottom (blue) box. Then the blue and pink side (back side) of this box will be adhered to the top right corner of your folded box. Make sure not to overlap the scored and folded edges or your friendship box will not close properly. Repeat the same adhesive technique to your second box and adhere it to the bottom left lower corner, again making sure not to overlap the fold.
I
Once you have adhered these two boxes, the other two can be adhered at evenly spaced intervals. Closing and capping your friendship box will allow it to dry well, remember it's folds and not only appear more equally square but function more easily.
Once your boxes are adhered inside it should look something like this:

I added charms to each of the box lids. I also journaled a personal message to the recipient in the blue box left lower corner.


Inside I placed a mini album of pictures that were taken since we met 5 years ago, yummy chocolates, a hand embroidered handkerchief, and a special poem.
* Always give credit where credit is due. This box was originally developed by members of "Stampin' Up"! and altered slightly for this project...thanks ladies for the ideas and the majority of the work.
** Materials & cutting list.
(A) Outside (1) frosted or vinyl 5 1/2" X 10
(B-1) (2) Outside patterned paper 5 1/2" X 10" One sided
(B-2) (1) Double Sided patterned paper 5 1/2" X 10"(B) Inside Boxes bottoms, (4) 5 1/2" X 5 1/2"
(C) Inside Boxes tops (4) 6" X 6"

(D) End Caps (2) Cardstock or patterned paper (2) 6 1/2" X 6 1/2"